Filipino-Style Crispy Fried Chicken
Filipino-Style Crispy Fried Chicken
Contents
- Ingredients
- Instructions
- Recipe Tips & Notes
- Comparison of Brining Methods
- Frequently Asked Questions
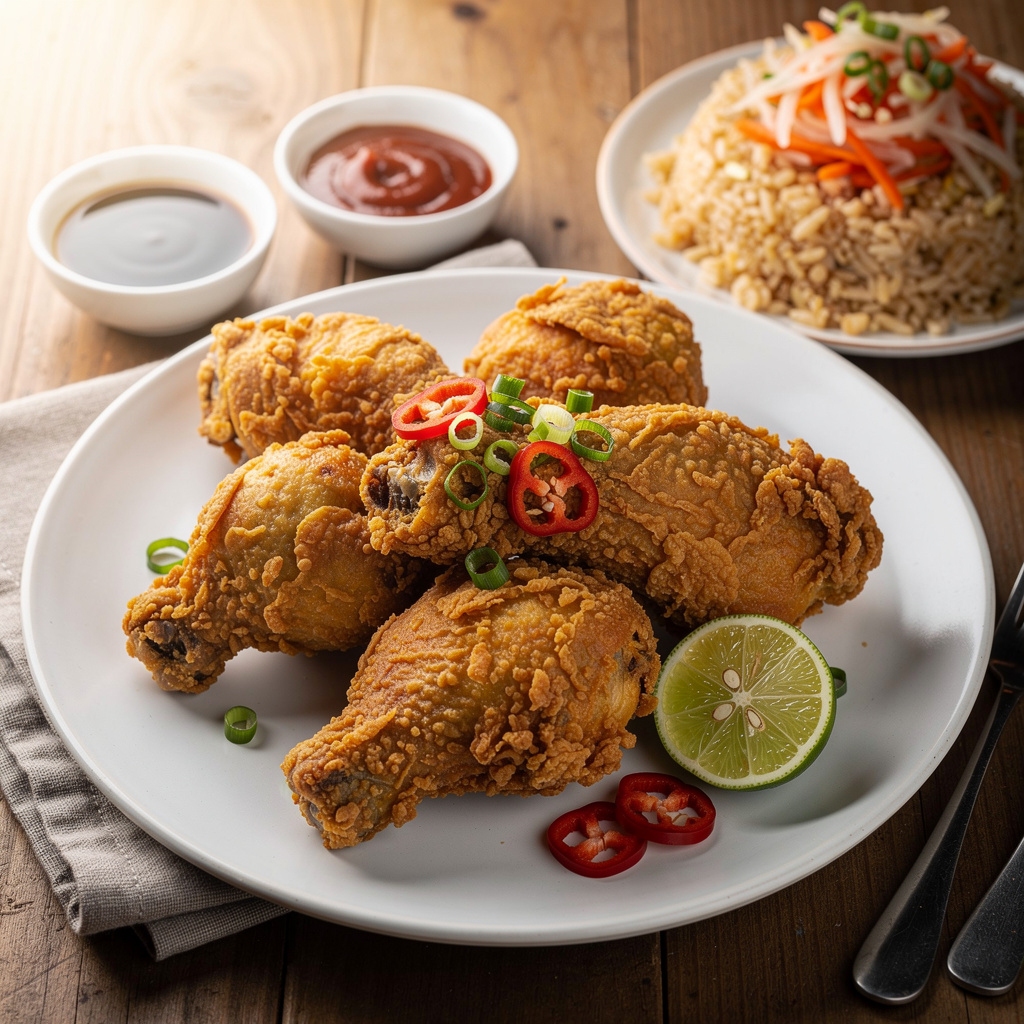
Filipino-style crispy fried chicken delivers juicy, tender meat beneath a shatteringly crunchy, craggy crust. The secret combines a seasoned buttermilk brine, a light batter, a final flour dredge, and a double-fry technique—adapted from multiple tested sources—to ensure the coating stays crisp long after frying.
Prep Time: 20 minutes
Cook Time: 45 minutes
Total Time: 9 hours (includes at least 4 hours brining)
Servings: 6
Ingredients
-
Buttermilk Brine
- 3 cups whole-fat buttermilk
- 3 tablespoons Cajun seasoning (store-bought or homemade)
- 3 tablespoons dill pickle juice
- 3 tablespoons hot sauce
- 1½ tablespoons kosher salt (Diamond Crystal; reduce by half if using Morton)
- 5 lb bone-in chicken pieces (mix of legs, thighs, breasts, wings)
-
Batter
- ¾ cup cornstarch
- ½ cup all-purpose flour (60 g)
- 2 tablespoons plus 2¼ teaspoons Cajun seasoning
- 3 large egg whites
- 6 tablespoons vodka (about ¼ cup plus 2 tbsp)
-
Flour Dredge
- 2¼ cups all-purpose flour (270 g)
- 2¼ cups cornstarch (360 g)
- 6 teaspoons kosher salt
-
For Frying
- Peanut or vegetable oil, enough for 3-inch depth in pot (about 10–12 cups)
Instructions
-
Prepare the buttermilk brine: In a large bowl, whisk together buttermilk, Cajun seasoning, pickle juice, hot sauce, and salt. Set aside ¾ cup of the brine for the batter.
-
Brine the chicken: Place chicken pieces in a gallon‑size resealable bag. Pour the remaining brine over the chicken. Seal the bag, pressing out excess air, and toss to coat. Lay the bag flat in the refrigerator. Let marinate at least 4 hours, or up to 24 hours for best flavor and tenderness.
-
Make the batter: In a large bowl, whisk together cornstarch, flour, and Cajun seasoning. In a small bowl, whisk egg whites, vodka, and the reserved ¾ cup buttermilk brine. Pour the wet mixture into the dry ingredients and gently whisk until just combined—a few small lumps are fine.
-
Prepare the flour dredge: Place one large paper lunch bag inside another (or use a large container with a lid). Add flour, cornstarch, and salt, then whisk or shake to combine.
-
Coat the chicken: Remove chicken from brine and pat thoroughly dry with paper towels. One piece at a time, dip the chicken into the batter, allowing excess to drip off. Drop the dipped piece into the paper bag with the flour dredge, close the bag, and shake until evenly coated. Transfer to a wire rack set over a baking sheet.
-
First fry: Pour oil into a large Dutch oven to a depth of 3 inches. Heat over medium heat until a deep‑fry thermometer reads 325°F (163°C). Working with 2–3 pieces at a time (do not overcrowd), carefully lower chicken into the oil. Adjust heat to maintain oil temperature between 290°F and 300°F. Fry until golden brown and the internal temperature reaches 165°F (74°C) at the thickest part: about 10 minutes for white meat (breasts, wings) and 13 minutes for dark meat (thighs, drumsticks). Transfer to a clean wire rack. Let rest 15 minutes.
-
Second fry (double‑fry): Heat the oil again until it reaches 350°F (177°C). Fry the chicken in batches for 3–4 minutes, until the crust is deep golden brown and extra crispy. Drain on the wire rack.
-
Serve: Let chicken cool for at least 10 minutes before serving. Optionally sprinkle with flaky sea salt.
Recipe Tips & Notes
- Don’t skip the brining: The buttermilk brine tenderizes the meat and infuses flavor. A shorter brine (4 hours) works, but overnight (up to 24 hours) gives the best results.
- Double‑fry is essential for lasting crispness: The first fry cooks the chicken through; the second fry at higher temperature revives and deepens the crust. If you prefer a single fry, cook at 325°F for 12–15 minutes total, but the coating may soften faster.
- No vodka? You can substitute the vodka with water, but the crust may be slightly less crispy. Vodka evaporates quickly, promoting a drier, crunchier coating.
- Dark vs. white meat: Fry dark and white pieces in separate batches to avoid inconsistent cooking times.
- Keeping warm: Hold fried chicken on a wire rack in a 250°F (120°C) oven while finishing other batches.
- Storage: Refrigerate leftovers in an airtight container lined with paper towels for up to 4 days. Reheat in a 350°F oven or air fryer for 8–10 minutes to restore crispness.
Comparison of Brining Methods
Some fried chicken recipes skip the buttermilk brine for a quicker approach. The table below contrasts the two main methods found in the sources.
| Method | Typical Time | Texture & Flavor | Notes |
|---|---|---|---|
| Buttermilk brine + double‑fry | 4–24 hours brining + 2 frying stages | Ultra‑tender meat; very crisp, long‑lasting crust | Recommended by Delish and Preppy Kitchen for “shattering” crunch |
| Dry‑salt seasoning + single fry | 30 minutes salting + one fry (12–15 min) | Good crust, slightly less tender; coating may soften faster | Used by Taste of Home and The Kitchn for a faster, simpler recipe |
Conflict note: Sources disagree on whether brining is necessary. Delish and Preppy Kitchen insist on at least 4 hours of buttermilk brining for best results, while Taste of Home seasons the chicken only with salt and fries it immediately. The Kitchn uses a 30‑minute salt rest (or overnight) but no liquid brine. Choose based on time available.
Frequently Asked Questions
Can I use all‑purpose flour only, without cornstarch?
Several sources recommend replacing up to one‑quarter of the flour with cornstarch for extra crispness. Using only flour will still work, but the crust will be less shatter‑crisp.
What if I don’t have Cajun seasoning?
Make your own with paprika, garlic powder, onion powder, cayenne, black pepper, and dried thyme. You can also use any bold seasoning blend; the key is a mix of salt, heat, and herbs.
Why do I need a double fry?
The first fry cooks the chicken; the second fry at higher heat crisps the coating again after it softens during resting. If you skip the second fry, the crust may become soggy within minutes.
Can I use an air fryer instead?
Yes, but the texture will differ. Air‑frying produces a crisp crust, but it won’t achieve the same deep‑fried crunch or even browning. Follow an air‑fryer specific recipe for best results.
How do I know when the chicken is done?
Use an instant‑read thermometer inserted into the thickest part of the meat without touching bone. The USDA safe minimum is 165°F (74°C). The juices should run clear when pierced.
Can I make this gluten‑free?
Substitute all‑purpose flour with a 1:1 gluten‑free blend that contains rice flour or oat flour. Cornstarch is naturally gluten‑free. Note that the crust may be slightly less cohesive.
Related guides
- Arroz Caldo
- The Complete Guide to Filipino Chicken Adobo
- Chicken Afritada: A Complete Guide to the Classic Filipino Tomato Stew
- Filipino Chicken Curry: A Creamy, Mild Coconut-Based Stew
- Chicken Inasal: The Ultimate Filipino Grilled Chicken Guide